Troubleshooting printer problems can often be a frustrating endeavor, but by adopting a methodical approach, you can usually overcome these issues with relative ease. This comprehensive guide will assist you in resolving common problems effectively.
Also read: 13-Step Guide to Optimize Your Computer: Boost Performance and Efficiency
-
Check for Basic Issues
Begin by confirming that the device is correctly connected to both the power source and your computer. Ensure that all cables are securely attached to their respective ports.
Next, make certain that it is powered on. Sometimes, a simple oversight like a switched-off the device can lead to printing problems.
Check the paper tray to see if it contains enough paper and whether the paper is loaded properly. Improper paper loading can result in paper jams and printing errors.
-
Check Printer Status and Errors
Inspect the printer’s display screen (if available) for any error messages or warnings. These messages often provide crucial information about the issue at hand.
On your computer, look for error messages related to the printer. For Windows users, navigate to the Control Panel and select “Devices and Printers.” Mac users can access printer status through “System Preferences” > “Printers & Scanners.” Investigate any error messages you encounter for insights into the problem.
-
Restart Everything
Perform a power cycle on the printer to refresh its settings. Begin by turning off the printer, unplugging it from the power source, waiting for approximately a minute, and then plugging it back in before turning it on again. This can resolve minor glitches that may be causing printing troubles.
Similarly, restart your computer to ensure that it is not causing any conflicts with the printer. A simple restart can often resolve communication issues between the computer and the printer.
By systematically addressing these fundamental steps, you can often pinpoint and resolve the most common printer problems. If the issue persists after following these troubleshooting steps, consult the printer’s user manual for additional guidance or consider seeking professional assistance to diagnose and repair any hardware issues. Remember that patience and methodical troubleshooting are key to successfully resolving printer problems and getting back to your printing tasks with minimal disruption.
-
Check Printer Connections
After ensuring the basics are in order, move on to verifying the printer’s connections. If your printer is a USB model, confirm that it’s securely connected to your computer. Ensure that the USB cable is properly inserted into both the printer and the computer’s USB port. For network printers, it’s essential to check the stability of the network connection. Make sure the printer is assigned the correct IP address, and there are no network issues affecting its communication with your computer.
-
Update Printer Drivers
Printer drivers act as intermediaries between your computer’s operating system and the printer hardware. Outdated or corrupt drivers can often lead to printing problems. To address this, visit the official website of the printer manufacturer. They usually provide a dedicated section where you can download and install the latest drivers specifically designed for your printer model. This simple step can resolve compatibility issues and enhance printing performance.
-
Clear Print Queue
A frequently overlooked issue that can cause printer trouble is a stuck print job in the print queue. To address this, open the print queue on your computer. You can typically find this by searching for “Devices and Printers” on Windows or accessing it through your computer’s system preferences on Mac. Once in the print queue, cancel any pending print jobs. Clearing the queue allows for a fresh start and can often resolve issues where the printer seems unresponsive.
-
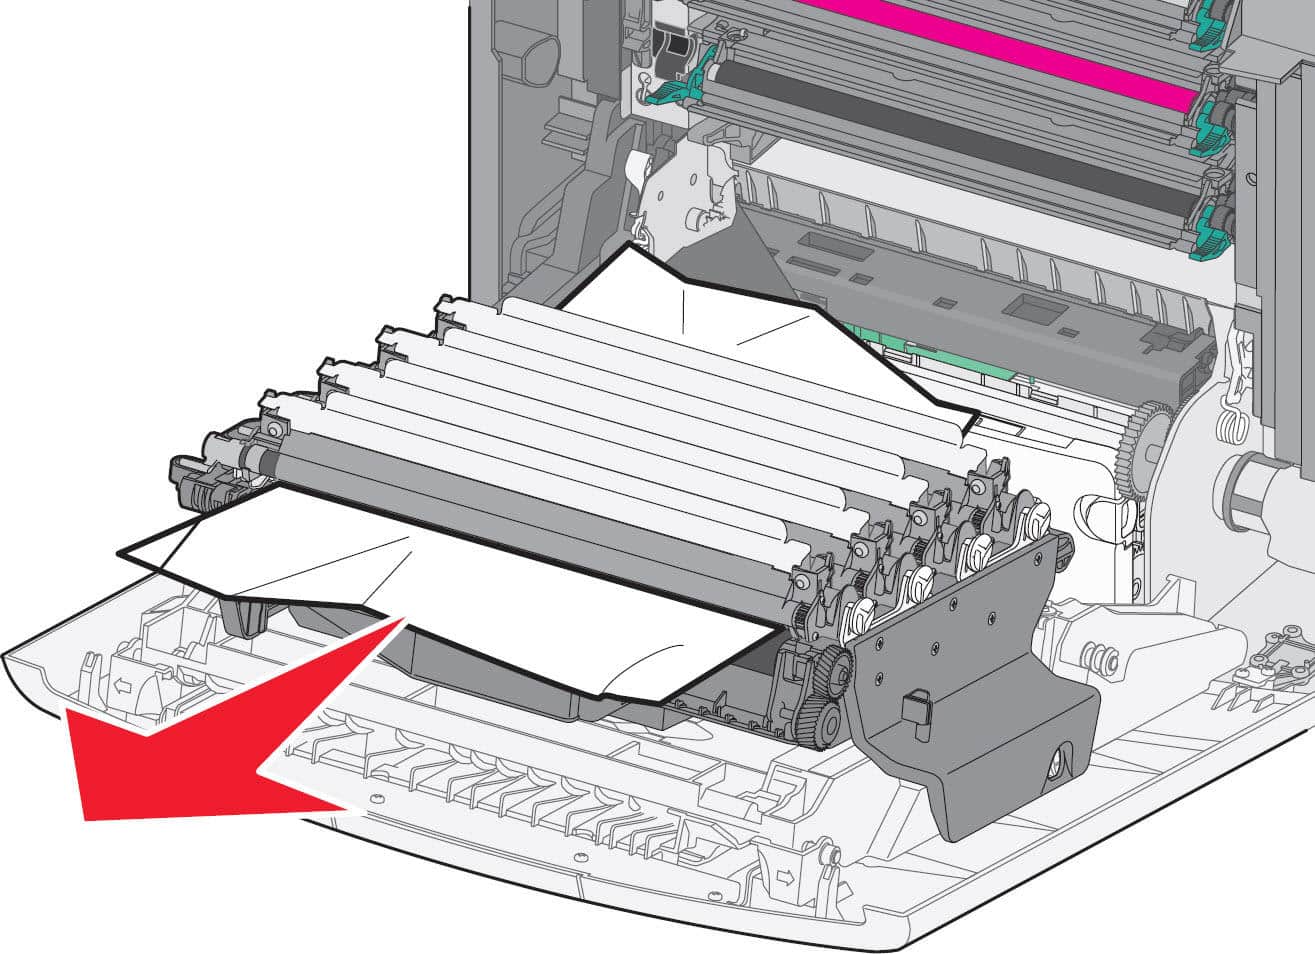
Check for Paper Jams
Paper jams are common printer problems that can be easily resolved. If your printer displays a paper jam error, approach this carefully. Refer to your printer’s manual for guidance on how to open it and remove any jammed paper properly. Exercise caution to avoid damaging the printer or causing further issues. Clearing out paper jams is a crucial step in maintaining the proper functioning of your printer.
-
Check for Ink or Toner Issues
The availability of ink or toner is critical for successful printing. Ensure that your printer’s ink or toner levels are sufficient. Low or empty cartridges can lead to poor print quality or prevent printing altogether. Many modern printers display ink or toner levels on their screens or provide software alerts. Replacing or refilling depleted cartridges is a straightforward solution to this issue.
-
Run the Printer Troubleshooter
Both Windows and Mac operating systems come equipped with built-in printer troubleshooters. These tools are designed to automatically diagnose and attempt to fix common printer problems. To access them, navigate to your computer’s settings or control panel. In Windows, you can search for “Troubleshoot” and select “Printer” from the list of available troubleshooters. On a Mac, go to “System Preferences” and select “Printers & Scanners,” then click on the “Open Print Queue” button, where you’ll find the “Troubleshoot” option. Running these troubleshooters can often identify and resolve printer issues quickly.
By diligently addressing these advanced troubleshooting steps, you can effectively tackle a wide range of printer problems, ensuring that your printing tasks proceed smoothly and without unnecessary interruptions. If the issue persists even after following these steps, consider reaching out to the printer manufacturer’s customer support or a qualified technician for further assistance in resolving the problem.
-
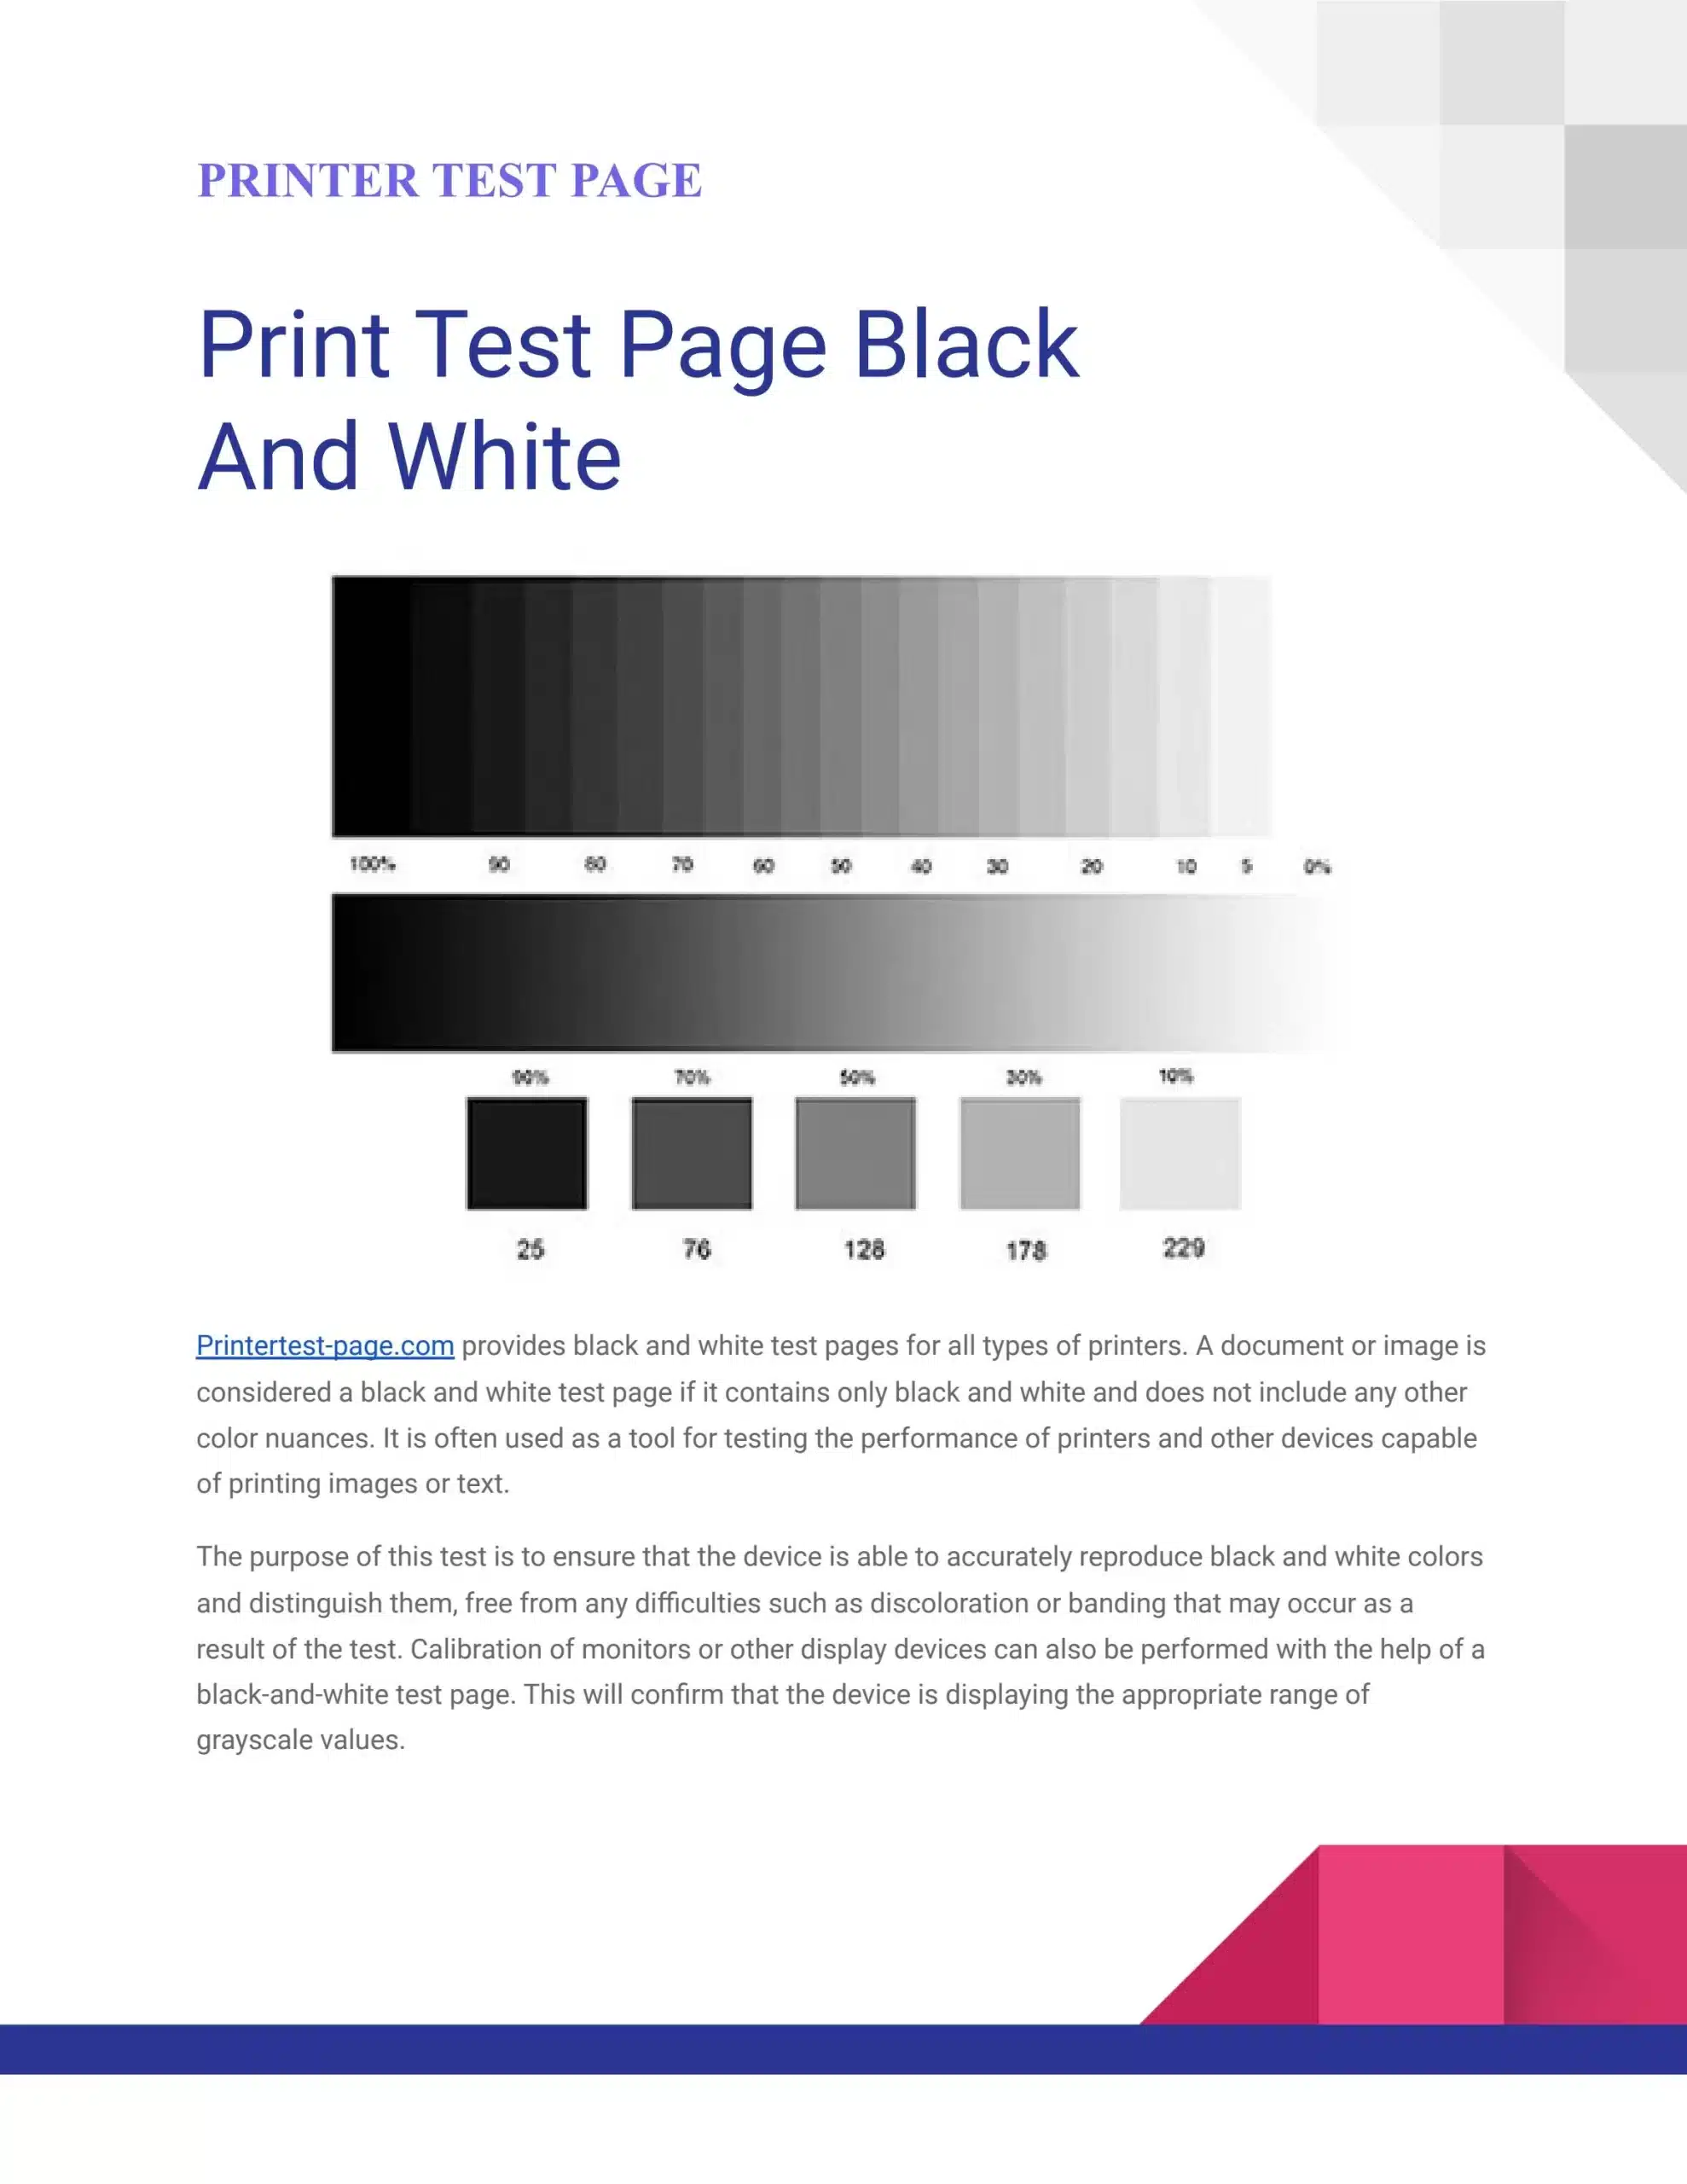
Perform a Test Print
To further isolate the issue, utilize your printer’s built-in self-test feature, following the instructions outlined in your printer’s manual. This self-test allows the printer to print internally without relying on the computer. If the self-test produces successful results, it suggests that the printer hardware is functioning correctly, directing your focus towards potential computer-related problems. Conversely, if the self-test fails, it indicates a hardware issue with the printer itself.
-
Check Printer Settings
Double-check the printer settings configured on your computer. Ensure that you have chosen the correct printer from the list of available devices. Additionally, verify that the selected paper size and type match the settings required for your printing job. Incorrect settings can lead to unexpected printing outcomes and must be rectified for consistent and error-free printing.
-
Reinstall the Printer
If none of the preceding steps have resolved the issue, consider removing the printer from your computer and performing a fresh installation. Sometimes, glitches in the printer software or driver conflicts can persist despite troubleshooting efforts. Removing and reinstalling the printer often clears these issues. First, uninstall the printer software and drivers from your computer, then reconnect the printer and follow the manufacturer’s instructions for installing the latest drivers and software.

-
Consult the Manufacturer’s Support
Should the problem persist despite your best efforts, it’s advisable to contact the printer manufacturer’s customer support. They are well-equipped to offer specific troubleshooting guidance tailored to your printer model. Additionally, visit the manufacturer’s website, which may contain comprehensive troubleshooting guides and frequently asked questions related to your printer’s particular issues. Manufacturer resources can be invaluable in diagnosing and resolving more complex problems.
-
Consider Professional Help
In instances where all prior attempts have been exhausted, and the printer remains non-functional, it might be time to seek professional assistance. Experienced technicians possess the expertise to diagnose and repair both hardware and software-related printer issues. Contacting a reputable repair service can be a practical solution, ensuring that your device is back in working order efficiently and reliably.
Remember always to refer to your printer’s manual for model-specific troubleshooting instructions, as different printers may have unique procedures and features. When conducting any physical maintenance on the printer, exercise caution to avoid damaging the device further. With persistence and careful troubleshooting, many problems can be resolved without the need for professional intervention. However, when the issue becomes too complex or beyond your expertise, professional help remains a viable option to get your device back in top form.